How to Optimise Images for Web

Did you know that optimising your images before uploading to WordPress can have a significant impact on the speed of your website? Many new bloggers simply upload images without optimising them for the web when they first start a blog. These large image files slow down your website.
You can correct this by incorporating image optimisation best practices into your regular blogging routine. We’ll show you how to optimise your images for faster web performance without sacrificing quality in this article. We’ll also show you how to use automatic image optimisation plugins for WordPress to make your life easier.
We have created an easy-to-follow table of content because this is a comprehensive guide on image optimisation for the web:
- What Exactly Is Image Optimisation?
- What Are the Advantages of Image Enhancement?
- Image Saving and Optimisation for Web Performance
- Best Image Optimisation Software and Tools
- Best Image Optimisation Plugins for WordPress
- Final Thoughts and Image Optimisation Best Practices
What Exactly Is Image Optimisation?
Image optimisation is the process of saving and delivering images in the smallest file size possible while maintaining overall image quality. While the process may appear complicated, it is quite simple these days. You can automatically compress images by up to 80% using one of the many image optimisation plugins and tools available, with no visible loss in image quality.
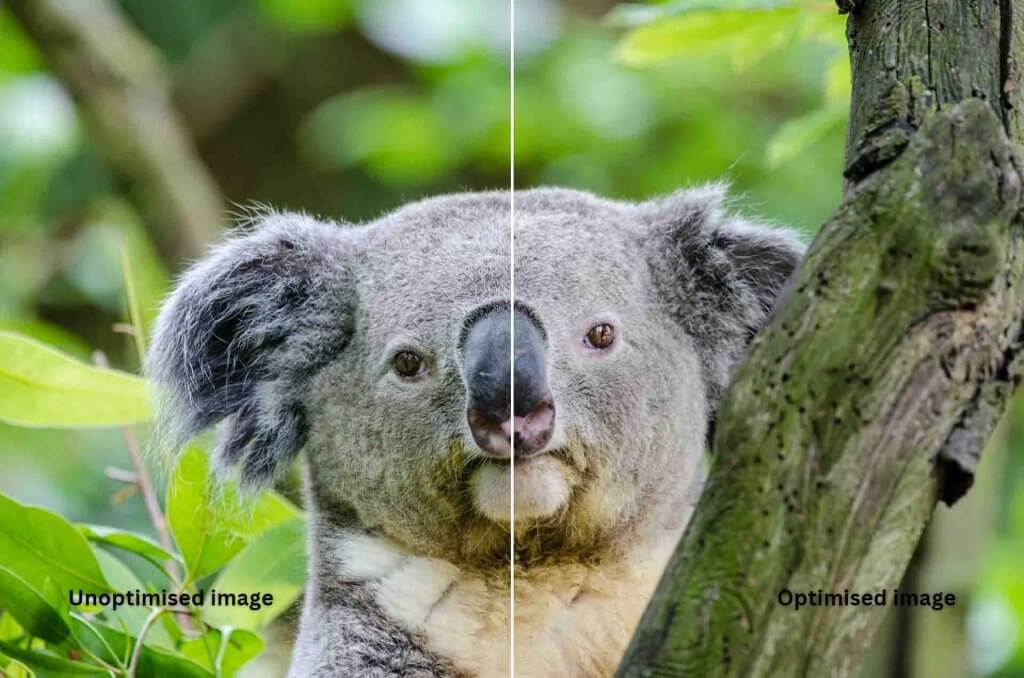
Here’s a comparison of optimised and unoptimised images:

As you can see, when properly optimised, the same image can be up to 80% smaller than the original without sacrificing quality. The image in this example is 52% smaller.
What Is the Process of Image Optimisation?
To put it simply, image optimisation works by utilising compression technology. Lossy or lossless compression can be used.
Lossless compression reduces overall file size while preserving image quality. There may be a minor loss in quality with lossy compression, but it should not be noticeable to your visitors.
What Does Image Optimisation Mean?
You may have received an image optimisation recommendation from your WordPress hosting support or a speed test tool and are unsure what to do next. You will need to optimise your images for the web to reduce their file size. We’ll walk you through the process step by step.
What Are the Advantages of Image Enhancement?
While there are numerous advantages to optimising your images, the following are the most important ones to be aware of:
- Increased website speed
- Increased SEO rankings
- Increased overall sales and lead conversion rate
- Reduced storage and bandwidth (which can reduce hosting and CDN costs)
- quicker website backups (which can reduce the cost of backup storage)
After the video, images are the second-heaviest item on a web page. Images account for 21% of the total weight of an average webpage, according to the HTTP archive. Image optimisation is something that every business website must do if they want to succeed online because we know that fast websites rank higher in search engines (SEO) and have higher conversions.
You may be wondering how much of a difference image optimisation can make. A one-second delay in website load time can cost you 7% of sales, 11% fewer page views, and a 16% decrease in customer satisfaction, according to a Strangeloop study. If these aren’t enough reasons to speed up your website, you should know that search engines like Google give faster-loading websites preferential SEO treatment.
This means that by optimising your images for the web, you can improve website speed while also increasing your WordPress SEO rankings.
Image Saving and Optimisation for Web Performance
The key to successful image optimisation for web performance is achieving the ideal balance between small file size and acceptable image quality. The three most important factors in image optimisation are:
- Image file type (JPEG vs PNG vs GIF)
- Compression (a higher compression rate results in a smaller file size)
- Dimensions of the image (height and width)
You can reduce the size of your image by up to 80% by using the right combination of the three. Let’s take a closer look at each of these.
- Image File Extensions
Most website owners only care about three image file formats: JPEG, PNG, and GIF. Choosing the right file type is critical in image optimisation. To keep things simple, use JPEGs for photos or images with many colours, PNGs for simple images or when you need transparent images, and GIFs for only animated images.
For those who are unfamiliar with the distinctions between file types, the PNG image format is uncompressed, which means it is a higher-quality image. The disadvantage is that file sizes are significantly larger. JPEG, on the other hand, is a compressed file format that reduces image quality slightly to provide a significantly smaller file size.
GIF, on the other hand, uses only 256 colours and lossless compression, making it the best choice for animated images. We use all three image formats on WPBeginner depending on the type of image. - Squeezing
The next step is image compression, which is extremely important in image optimisation. Image compression comes in a variety of types and levels. Depending on the image compression tool you use, the settings for each will differ.
Most image editing software, including Adobe Photoshop, ON1 Photo, GIMP, Affinity Photo, and others, include image compression features. You can also save images normally and then use a web tool such as TinyPNG or JPEGmini to compress them. Even though they require some manual effort, these two methods allow you to compress images before uploading them to WordPress, which is what we do on WPBeginner.
Several popular WordPress plugins can automatically compress images when you first upload them, such as Optimole and EWWW Image Optimiser. This is convenient, and many novices as well as large corporations prefer to use image optimisation plugins. Later in the article, we’ll go over how to use WordPress plugins in more detail. - Dimensions of the Image
When you import a photo from your phone or digital camera, it typically has a high resolution and large file dimensions (height and width). These photos typically have a resolution of 300 DPI and dimensions ranging from 2000 pixels and up. While high-quality photos are ideal for print or desktop publishing, their large size prevents them from being used on websites.
Image file size can be significantly reduced by reducing image dimensions to something more reasonable. You can easily resize images on your computer by using image editing software. We optimised a photo with a resolution of 300 DPI and image dimensions of 49003200 pixels, for example.
The original file was 1.8 MB in size. We used the JPEG format for better compression and increased the size to 1200×795 pixels. The file size has been reduced to 103 KB.
This is 94% less than the original file size.
Now that you’ve learned the three most important aspects of image optimisation, let’s look at some image optimisation tools for website owners.
Best Image Optimisation Software and Tools
As previously stated, most image editing software includes image optimisation and compression settings. Aside from image editing software, there are several powerful free image optimisation tools available to help you optimise images for the web (with just a few clicks).
If you are a perfectionist, we recommend using these tools to optimise images before uploading them to WordPress. Because you manually review each image, this method saves disc space on your WordPress hosting account while also ensuring the fastest image with the best quality.
GIMP
GIMP is a free and open-source Photoshop alternative. It is useful for optimising images for the web. The disadvantage is that it is not as simple to use as some of the other solutions on this list.
To begin, open your image in GIMP and then choose File » Export As… from the menu. This will open the Export Image dialogue box, where you can rename your file. After that, click the ‘Export’ button.
You should now see image export options. To select the compression level and reduce file size for JPEG files, use the ‘Quality’ slider. Finally, press the ‘Export’ button to save the optimised image file.
JPEGmini
JPEGmini employs lossless compression technology to significantly reduce image size while maintaining perceptual quality. You can also contrast the quality of the original and compressed images.
You can use their web version for free or buy the programme to instal on your computer. They also have a paid API that you can use to automate the process for your server.
Photoshop by Adobe
Adobe Photoshop is a high-end image editing programme that allows you to export images with smaller file sizes for the web. Using the export dialogue, you can select the image file format (JPG, PNG, or GIF) with the smallest file size. You can also reduce image quality, colours, and other options to reduce the file size even further.
TinyPNG
TinyPNG is a free web app that reduces the size of your PNG and JPEG files using a smart lossy compression technique. All you have to do is go to their website and drag and drop your images there. They will compress the image and provide you with a link to download it.
They also have an Adobe Photoshop extension, which we use as part of our image editing process because it allows you to access TinyPNG from within Photoshop. For developers, there is an API for automatically converting images, and for beginners, there is a WordPress plugin that will do it for you. More to come on this later.
ImageOptim
ImageOptim is a Mac utility that can compress images without sacrificing quality by determining the best compression parameters and removing unnecessary colour profiles. Trimage is a Windows alternative to this.
Best WordPress Image Optimisation Plugins
We believe that optimising your images before uploading them to WordPress is the best way to do so. If you have a multi-author site or require an automated solution, you can use a WordPress image compression plugin. The following are our recommendations for the best WordPress image compression plugins:
- EWWW Image Optimiser
- Imagify, a plugin by the popular WP Rocket team
- Smush
- Optimole, a popular plugin by the team behind ThemeIsle
- JPEG, PNG & WebP Image Compression, a plugin by the TinyPNG team mentioned above
- ShortPixel Image Optimiser
- reSmush.it
These WordPress image optimisation plugins will assist you in increasing the speed of your website.
Final Thoughts and Image Optimisation Best Practices
If you aren’t already saving images optimised for the web, you should start now. It will make a significant difference in your site’s speed, and your users will appreciate it. Not to mention that faster websites are better for SEO and will likely improve your search engine rankings.
Aside from image optimisation, using a WordPress caching plugin and a WordPress CDN will significantly help you speed up your website. You can also use a managed WordPress hosting company because they frequently include caching and CDN as part of the platform. We hope this article was useful in teaching you how to optimise your images in WordPress.
Improve your website’s search engine rankings and User Experience (UX) by optimising your images with our SEO service. Our team of experts will analyse your website’s images and provide recommendations on how to resize, compress, and properly name and tag them for maximum impact. Don’t let poorly optimised images hold back your website’s success.
Contact us today to learn more about our image optimisation services and take the first step towards improving your website’s performance and search engine visibility.

